Wednesday, October 1, 2014

Lighting in Real Shot


        Lighting is really hard and important in stop motion project. In order to re-create the real natural lights in the real world, especially outdoor sunlight, I need to use some big light and huge bouncing board to  mimic the flat key light. Also, bouncing light comes from every where in real world. However, in the stop motion room, in which all the walls except ceiling is pitch black, there is hardly have any bouncing light. C-stands and big white or silver foam board can do a really good job, but also occupy most the room that you need to stand at or access to the puppet. 

        I checked out three C-stands from PEC, and two of them can only act as light stand because I use the knuckles with baby plate to set fluorescent lights on the floor to create that background sky. Beside, there are other two C-stand used as support of the back drop.

        In order to save the only other two C-stands to good use. I shoot a light onto the ceiling directly, trying to create a big head bounce, but it doesn't work very well in every shot. Plus, the number of lights is limited too. 

        Most of time, I use two lights to light up the puppet and background hills. The surprise effect it create is that the hot spot and some darker spot make it looks like the shadow created by clouds. 

        When it comes to the foreground, things can be messy. I use small lights to light up some plants but it sometimes doesn't do me any good but just create multiple shadows on the ground. Another way to do it is shoot fore ground separately with FL/BL. It can achieve a better result with lighting effect. However, the technique of FL/BL require the object that being filmed to be sure in focus, otherwise the post keying alpha channel can be another nightmare. In this case, faking out of focus and perspective is added to the post workload.  


Sunday, September 21, 2014

Test Pictures

18mm/non-full sensor

18mm/non-full sensor

18mm/non-full sensor
composited with scales

35mm
composited with scales

Tuesday, September 16, 2014

Building the Set

I am building the set now.

We bought the foam and glue in Home Depot, and I shaped my foam with a little hand saw. Then glue them on the table top with white glue.


I want the world to be covered with fabric. I went to Jo-Ann to buy fabric and I found felt in ground color, yellow-ish brown. I couldn't find the green color I wanted so I bought the iDye Poly.

Dying fabric was definitely a very difficult and tired job. With a big pot of boiling water, the fabric that was cut into reasonable size was totally soaked in colored water. The fabric dye was so stinky. However, we couldn't leave the window open because we will have unpleasant guests, termite, fly in.
boiling water with fabric color dye

pre-wet fabric and put it in the pot

air dry

The result was pretty good actually.  Green : Yellow : Blue = 4:1:1/2. +intensifier

Glue the fabric to table is another hard test. I mixed white glue with water as 1:1, and brush it on the set. Felt was not very cooperate. I tried to press it down and pin it...and the white glue went  through at some spot that made the fabric looks very ugly.

I mixed paint into the glue and then did the same thing on other table. The felt looks much nicer:)
measure the fabric over the table

mix color into glue

try puppet on it


After finished the big tables, we found out super 77 was much easier to hold fabric onto the foam...

Tuesday, September 2, 2014

Test Shots Links

Nice To Meeteor You_Test_005
The eyes move too quick.

Nice To Meeteor You_Test_011
I think the shot could be wider, maybe?

Nice To Meeteor You_Test_022
I do need flying rig for him, because his arms are so short while his head is huuuuuge. It is really hard for him to reach that high up to the cloud...He needs to stand on his toes where there is no tie down...

Nice To Meeteor You_Test_035
The movement is too even overall. He is a kid who should be more clumsy. BREAK THE PATTERN!!

Create a universe in my bedroom~

It might sounds like the most dreamy thing you can ever do.

But it is not...
moon

blue icee planet

untitled panet

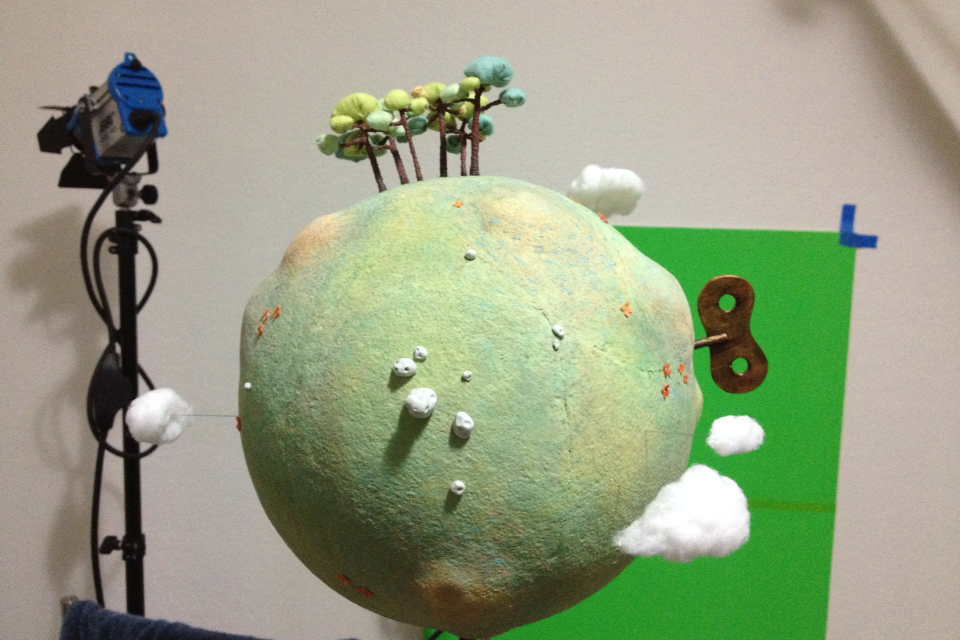
And of course the most important planet- my wind-up planet.

Green screen apparently does not work for my green planet. so...
pink foam board is the best thing I can find...It is not working super great...but doable.


Monday, September 1, 2014

Step by Step

I don't really sure how to build the stop motion table right, so I need time to figure that out. In order to keep up with my schedule, during the time I am trying to contact people who can help on building the tables, I will finish the first group shots (four shots) that have no need of any table.

-001_the wide shot of the cosmic, the wind-up planet turns to the audience and the key is keep turning. Then there is small meteor crashes on the side of it.
-009_the cat (mini version) is hugging the meteor friend, and the big shinning star (post) hit on the planet. With the impact, trees and key will jump off and fall back to where they were and clouds will moving away.
-045_cat is holding the box (mini version) with super long shadow behind.
-054_bright light spreads out from the box and covers the entire planet. The planet key disappears.

There are a lot to be done before I can shoot them, the planet, the key, the mini cat, the mini box, the mini meteors, the trees...and of course, other planets that in the cosmic.
my naked planet with little hills.

I was thinking maybe the wind-up planet should be just a ball. But since the planet is so small in my story, maybe everything should be visible. It will make the planet looks more interesting too:)

Props Test

clouds
-I have to use the hair spray to keep it in shape.

meteors

meteor with long shadow

tree
-mini tree is fun to make. but for the real size big tree, I may cheat by placing the leaves and trunk separately. I gonna need a lot C-stands... 

forest.
-I am super happy with the colors:(